techandtab
We may receive a commission on purchases made from links. Laptop makers have their work cut out for...
Microsoft Powertoys Explained: What Utilities Are Included & How To Install Them

Microsoft PowerToys is a set of tools that have been around since the days of Windows 95. They’re made and maintained by Microsoft, but they don’t come pre-installed on your Windows device, which is why a lot of people still don’t know about them. That’s a pity because PowerToys are easy to download and, once installed, make it easy to do things like change your screen layout, copy text from images, and add accents to your writing.
The utilities have changed since the Windows 95 and Windows XP versions, and they weren’t available at all at the release of the much-derided Windows Vista. Windows 10 and 11 PowerToys include 25 utilities and have tools for writing, file management, keyboard settings, and mouse functionality. We’ll cover four of our favorite PowerToys below, but if you’re keen to get started and install PowerToys on your computer, then skip to the last section.
Color codes at your fingertips with Color Picker

If you’re a designer, artist, or anyone who sees #FFFF00 and immediately thinks “yellow,” you’ll wonder how you ever managed without this tool. The Color Picker lets you instantly grab the hex, RGB, or other color code from anything on your screen. You can select the function from your PowerToys menu or use the shortcut keys WIN + SHIFT + C.
Next to your cursor, you’ll see a small box that displays the color of whatever you’re pointing to, along with the hex code. You click on the color you want, and it’s copied to your clipboard. It’ll also open up a display window showing the hex, RGB, and HSL codes with copy icons. You can also change settings to change the default code, show the color name, and select other color codes from a long list. You can even add new ones if the one you want isn’t included. Once you’ve got it, you’ll be amazed at how many times you use it.
Get a whole new layout with FancyZones
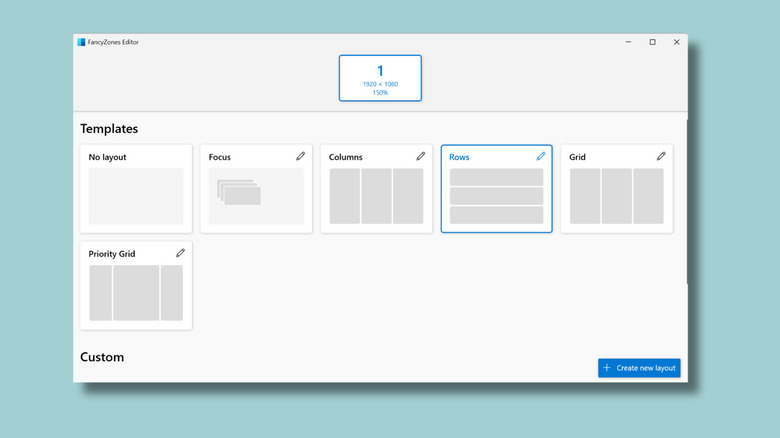
FancyZones takes window snapping to the next level. Sure, Windows 11 already lets you snap windows to one side of the screen, but FancyZones lets you create custom layouts. Want three equal columns? A big main window and two smaller ones on the side? No problem. This is a great tool if you’re juggling multiple apps, coding, or just happier if things are displayed a certain way.
To use FancyZones, either select it from the PowerToys menu or use the keyboard shortcut WIN + SHIFT + ‘ (apostrophe key). Select the layout you want. You can choose from focus (with overlapping zones), columns, rows, grid, or priority grid (where one window is larger than the others). Each layout gives you customizable options so you can adjust the number of zones and the amount of space between them. If none of them are quite what you’re after, you can create your own from scratch. Once your layout has been selected, just drag your windows into your custom zones.
Voilà! The Quick Accent tool
Have you ever struggled to find the right accent or special character while typing? Maybe you’re writing an essay and need to refer to books by Nguyễn Phan Quế Mai, Anaïs Nin, and Gabriel García Márquez.
Quick Accent makes this super simple. Hold down a letter key while pressing the left or right keys or the space bar. Quick Accent displays a pop-up menu with all the accented versions of that letter. It takes a few tries to get the hang of it, but once you’ve become accustomed to navigating the pop-up to select your ï or á, it becomes an intuitive way to write. There’s no need to interrupt your writing flow to search through Word’s symbols lists or copy and paste from elsewhere, so you can focus on your writing instead of hunting for the right character.
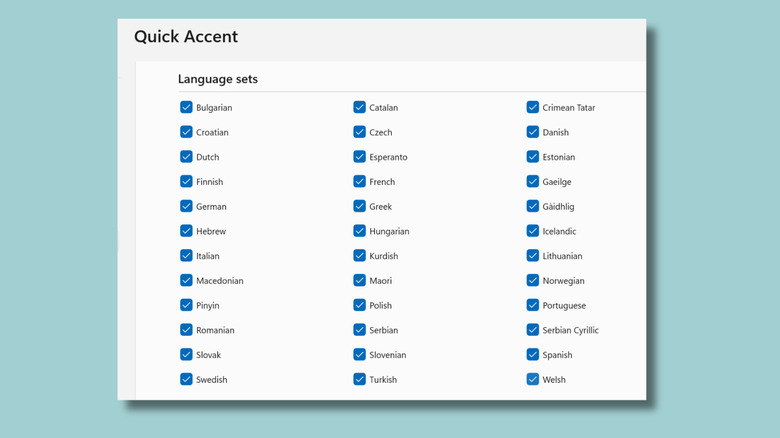
You can customize Quick Accent in the settings list by changing the position of the pop-up window and stipulating that it shouldn’t activate if you’re using Game Mode. You can reduce the number of language sets that it references. There are dozens of languages included by default, but if you know you’re only going to use Finnish, Norwegian, and Swedish special characters, then you can turn all the others off and save time on scrolling.
Extract the impossible with Text Extractor
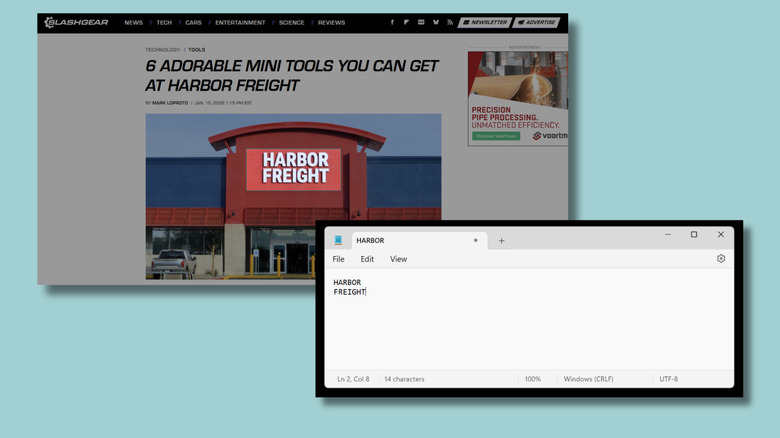
Sometimes, you need to copy and paste some text, but unfortunately, the text in question is on an image, in a non-editable PDF, or in some other format where Ctrl+C simply isn’t going to cut it. This is where Text Extractor comes in. It works a bit like Microsoft’s snipping tool, but instead of merely copying the screen, it turns the text you’ve highlighted into readable words, which you can then paste into a text file. Obviously, it doesn’t always work, especially if the writing is too small or blurry, but it’s a handy little tool to have at your disposal, nonetheless.
To use it, select it from the PowerToys menu or use the keyboard shortcut WIN + SHIFT + T. You then drag the highlighted box over the text you want, and it’s instantly extracted and copied. Whether it’s grabbing a phone number from a screenshot or copying text from an infographic, Text Extractor sorts it out with minimal fuss. You’ll wonder how you managed without it.
How to install Microsoft PowerToys
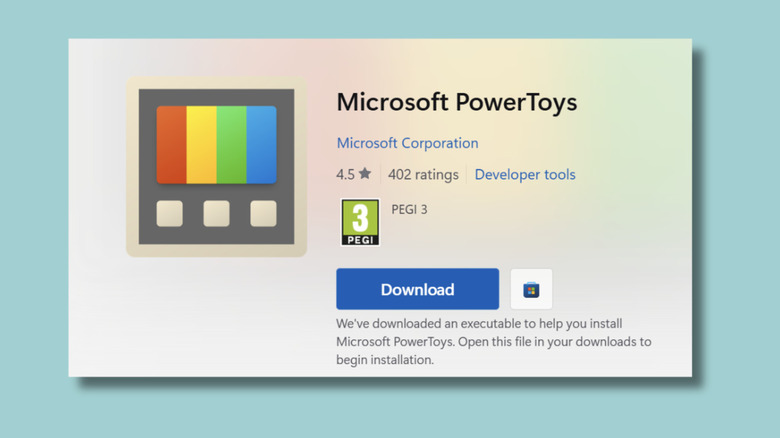
The tools we’ve covered above are only the tip of the iceberg. If you haven’t yet got PowerToys installed on your computer, getting it set up is quick and painless. You can download PowerToys from the official PowerToys GitHub page or get it via the Microsoft Store. Once downloaded, open the Microsoft PowerToys Installer.exe executable file to start the installation process.
When the installation is complete, PowerToys will be installed as an app on your device. You can open it from your search bar or go right ahead and use the keyboard shortcuts we gave you earlier. All the tools are customizable, and you can toggle them off and on from the main dashboard, so you don’t need to worry about activating a utility you know you’re never going to use. The best way to familiarize yourself with all the toys available is to get in there and play around with them. Some you’re never going to need, but you might well find that some of them quickly become indispensable.
Source: http://www.slashgear.com/1764236/microsoft-powertoys-explained-what-utilities-offered-collection-how-install-windows/
You may also like