 techandtab
We may receive a commission on purchases made from links. Trying to judge your computer's power can be...
How To Clear Your Computer’s CMOS
Not all computer troubleshooting can be handled within your operating system or by troubleshooting specific components. Some key computer functions are governed by the CMOS (Complementary Metal-Oxide-Semiconductor), a chip on your motherboard powered by a small battery. The CMOS governs things like the system time and date, which are controlled by the BIOS (Basic Input/Output System). These include system time and date, CPU clock speed, boot drive order and the boot process in general, and basic keyboard control functionality.
Sometimes, though, you might have a reason to clear the CMOS as part of the troubleshooting process. Maybe you’re getting bad results after trying to overclock your CPU and need to reset to factory default settings, or perhaps you changed some settings in the BIOS that you didn’t mean to and need to reset them. This could include something like setting a BIOS password and then forgetting it, necessitating the removal of the password. If you’ve changed hardware components recently, that’s another reason to consider clearing the CMOS to get a fresh start, particularly if you find yourself encountering compatibility issues.
There are a few ways to clear the CMOS. The most obvious one involves going into the BIOS menu, but there are also hardware options that involve removing and reseating the CMOS battery or moving around a jumper on the motherboard. Let’s take a step-by-step look at each of the three different ways that you can clear the CMOS on your motherboard.
Via the BIOS menu
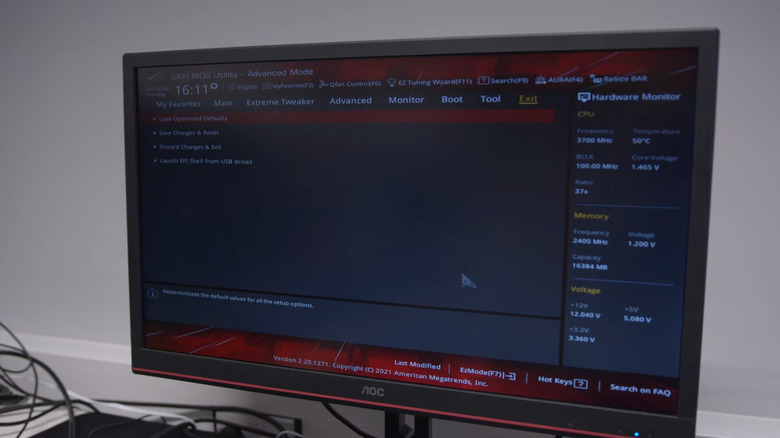
The easiest way to resent the CMOS on your motherboard is to do so by launching the BIOS menu at boot-up and following the steps there. The particulars vary by the specific motherboard’s BIOS, but you should find it under a label like “clear BIOS,” factory default,” “load defaults,” “reset to default,” and so on. Again, the specifics are dependent on your motherboard manufacturer and the BIOS it uses on that model, so there’s no way that we can do a one-size-fits-all step-by-step guide to doing this in software. However, as an instructive example, let’s take a look at the standardized steps that Dell has outlined for clearing the CMOS on its computers:
- Turn on your computer.
- Immediately tap the F2 key rapidly until “Entering Setup” appears on the screen, loading the BIOS menu.
- Depending on the motherboard model, you either click on “Load defaults” (if it’s a newer UEFI BIOS with mouse control), press the F9 key, or press the Alt + F keys to load the board’s default settings
- Press Esc.
- Depending on the model, select either “Save and exit” or “Exit.”
- Press Enter to save your changes and leave the BIOS menu.
- Let the computer restart itself and boot into whatever operating system you have installed.
That’s it! Since this doesn’t require opening up your computer, much less physically futzing with your motherboard, it’s the most palatable option for most people. It’s not the only option available to you, though.
Reseating the CMOS battery
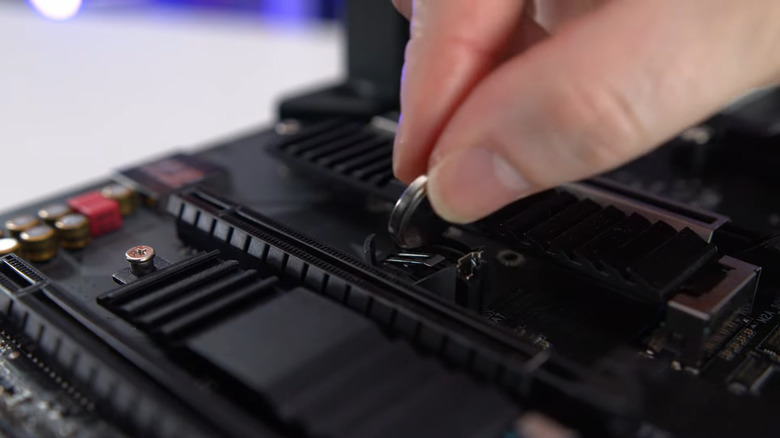
Alternatively, another way you can reset the CMOS — and one that’s more or less standard across all motherboards — is to physically remove and re-seat the CMOS battery on the motherboard. There might be some differences depending on the manufacturer, but in broad strokes, it’s usually about the same regardless of the board. To remove and re-seat the CMOS battery:
- Shut down and power off your computer.
- Unplug the computer from all peripherals and external power sources, including the battery if it’s a laptop with a removable battery.
- Take precautions to ground yourself from static electricity and potentially manage the screws keeping your computer case together.
- Open up the computer case.
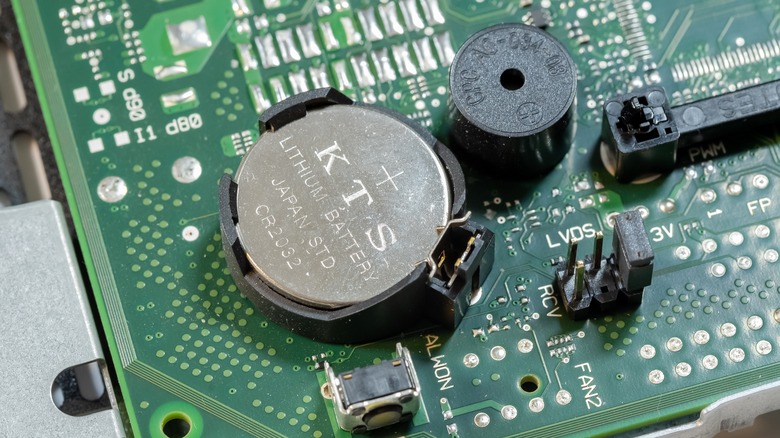
- Locate the CMOS battery. If it’s in a battery holder, remove it, making sure to keep track of which side is positive and which is negative. If it’s wired to a connector attached to a motherboard header, unplug the connector from the header.
- Some manufacturers, like Dell, suggest you press and hold the computer’s power button for 10 to 20 seconds to drain any residual electricity at this point. Intel, meanwhile, suggests waiting one to five minutes at this point before putting everything back together.
- Re-seat the battery by reversing what we described in step 2.
- Close the case.
- Reconnect the power and peripherals.
- Turn on the computer and enter your BIOS (the method for which will vary by the manufacturer and model) to set the time and date since it’s been cleared with the CMOS, then save and exit.
Short the ‘CLEAR CMOS’ jumper on your motherboard
![]()
If you’ve assembled a computer before, you may have noticed something on the motherboard that is relevant to this topic: A jumper labeled “CLEAR CMOS” or something similar, like “CLEAR,” “CLRPWD,” or even “PASSWORD.” It’s often right next to the BIOS chip or the CMOS battery, and shorting it is another way to reset the CMOS. That sounds more daunting than it actually is; it just requires moving around the plastic jumper that sits on the relevant pins. To do this:
- Shut down and power off your computer.
- Unplug the computer from all peripherals and external power sources, including the battery if it’s a laptop with a removable battery.
- Take precautions to ground yourself from static electricity and potentially manage the screws keeping your computer case together.
- Open up the computer case.
- Locate the jumper. If it’s covering two pins in a lineup of three pins, lift it and replace it on the other possible pair of pins. If there are just two pins, remove the jumper entirely.
- Close up the computer, plug it back in, re-attach the peripherals, and boot into the BIOS to confirm it’s been reset.
- Repeat steps 1-4.
- Return the jumper to its original state/position.
- Put everything back together and turn the computer back on.
That’s it! You’ve reset your CMOS using what’s probably the more pain-free of the two hardware options that we’ve outlined here. Your mileage may vary about which is preferable, though.
Source: http://www.slashgear.com/1751887/how-to-clear-cmos-windows-computer/
You may also like

