 techandtab
We may receive a commission on purchases made from links. Laptop screens are gunk magnets that attract all...
How To Completely Uninstall McAfee From Your PC Or Mac

McAfee is a well-known antivirus software that provides comprehensive protection against malware, viruses, and other online threats. However, there are several reasons you may want to remove McAfee from your PC or Mac — whether to switch to a better antivirus program, free up system resources, or because the pre-installed trial version has expired.
While uninstalling McAfee from your Windows or Mac may seem like a straightforward task, it often results in issues such as leftover files or browser extensions that remain active even after the main app is removed. These residual files can clutter your system, cause unwanted pop-ups, or interfere with the installation of other security software.
In this article, we’ll guide you through the steps to uninstall McAfee from your Windows PC or Mac. By following these instructions, you can ensure that McAfee is fully removed, leaving your system clean and ready for a new security solution.
Uninstalling McAfee from a Windows PC
In most cases, you can remove McAfee the same way you would uninstall any other app or program from a Windows PC. Here’s how to uninstall it via the Control Panel:
- Press Win + R to open the Run dialog box.
- Type appwiz.cpl in the text box and hit Enter.
- In the Program and Features window that opens, locate and select McAfee on the list.
- Click the Uninstall button at the top and click Yes to confirm.
- Make sure you tick both the McAfee Total Protection checkbox and the one to remove antivirus files, then click Remove.
- Follow the on-screen prompts to remove the antivirus program.
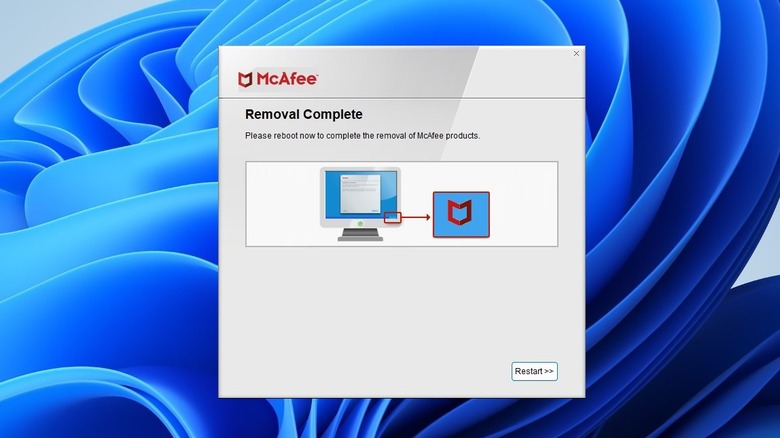
Once the process is complete, you will be prompted to restart your PC, so be sure to save any pending work beforehand. However, if the removal process fails or McAfee remains on your PC, you’ll need to use the McAfee Consumer Product Removal Tool (MCPR) to fully remove the antivirus. Here are the steps to do so:
- Download the McAfee Consumer Product Removal tool (MCPR) tool from McAfee’s support page.
- Double-click the MCPR executable file to run it.
- Follow the prompts to agree to the terms of McAfee’s user agreement and complete the security validation.
- Wait for the MCPR tool to run and uninstall the program.
- Click Restart to finish the removal process.
One of the methods above should help you completely uninstall McAfee from your Windows 10 or 11 PC, along with any residual files.
Uninstalling McAfee from a Mac
Removing the McAfee antivirus program from a Mac is just as quick, thanks to its dedicated uninstallation utility. Here’s how to use it.
- Close the McAfee app if it’s running on your Mac.
- Open Finder and select the Applications tab in the sidebar.
- Find the McAfee app uninstaller. It should be named something like “McAfee Total Protection Uninstaller.”
- Double-click the uninstaller to run it and click Continue.
- Enter your Mac administrator password to verify your identity and click OK.
From there, follow all on-screen prompts to remove the McAfee app from your Mac. While the McAfee uninstaller does a good job of removing the program, it often leaves behind leftover files, so you’ll need to remove them manually. To do this, open a Finder window and click on Go > Go to Folder from the menu bar. Then, navigate to the following directories one by one and delete any McAfee files you find. Do not delete the folders themselves.
- /usr/local/
- /Library/Application Support/
- /Library/LaunchDaemons/
- /Library/LaunchAgents/
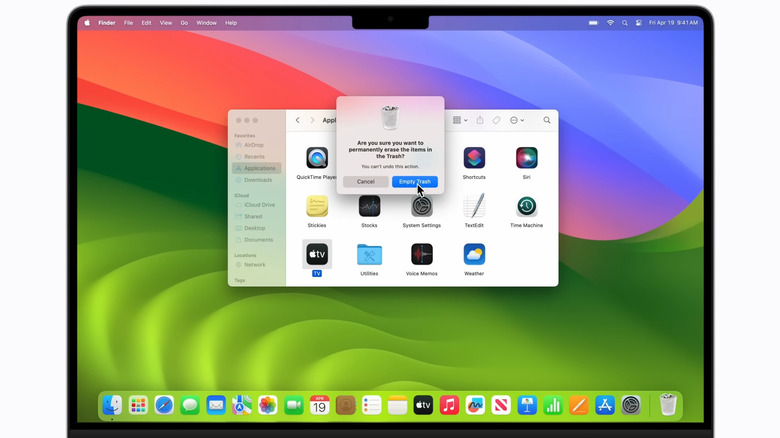
You can use the search box in the top-right corner of a Finder window to filter items. After manually removing McAfee files from the above directories, you’ll need to empty the Trash on your Mac to permanently delete the leftover files. To do that, click the Finder menu in the top left corner of the screen and select Empty Trash. Then, select Empty Trash to confirm.
Don’t forget to remove McAfee extensions
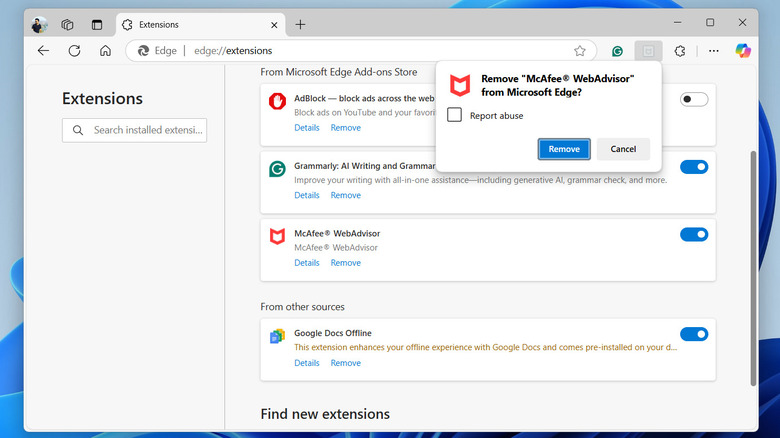
If you’ve been using McAfee’s browser extensions for added security, they may remain active even after the main program is uninstalled. As a result, you might continue seeing McAfee notifications or pop-ups on your PC or Mac. To ensure McAfee is completely removed, you’ll need to delete its extensions from your browser.
If you’re using Chrome or Edge, open it, click the three-dot menu in the top right corner, and select Extensions > Manage extensions. Then, find any McAfee extensions and use the Remove option to delete them. If you’re using Safari, you can follow these steps to get rid of the McAfee extension:
- Open Safari on your Mac.
- Click the Safari menu in the top left corner and select Preferences.
- Select the Extensions tab.
- Locate any McAfee extensions and click Uninstall to remove them.
Similarly, you can remove McAfee from any other browsers you may be using. Keep in mind that once you remove McAfee and its extensions, your system will no longer have antivirus protection unless you’ve activated another security software. To stay protected from viruses and malware, be sure to install and enable a trusted antivirus solution like Windows Defender.
Source: http://www.slashgear.com/1723154/how-to-completely-uninstall-mcafee-antivirus-guide/
You may also like

